
Introduction to Hardware-Based Security #
As security professionals increasingly recognize the importance of protecting private keys, hardware security devices have become an essential component of robust security postures. This article examines how to implement the Ledger Nano S as a secure PGP smartcard for Git commit signing and SSH authentication.
Hardware Security Benefits #
The Ledger Nano S provides significant security advantages over software-based key management:
- Physical Isolation: Private keys never leave the device
- Tamper Resistance: Hardware protection against extraction attempts
- PIN Protection: Multiple security layers before key usage
- Portable Security: Consistent security across multiple workstations
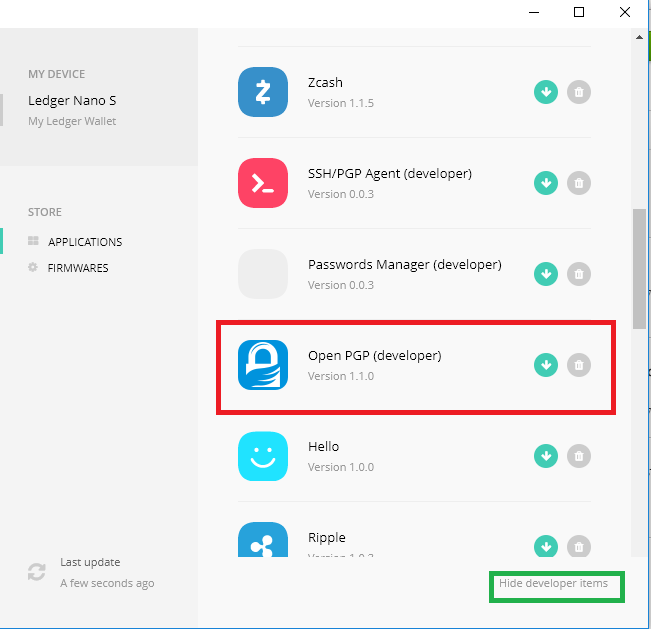
Ledger Nano S Capabilities #
The Ledger Nano S is primarily known as a cryptocurrency hardware wallet, but its capabilities extend well beyond this application. Through the OpenPGP implementation, the device can store three independent cryptographic keys:
- Signing Key: Used for document signing and Git commit verification
- Encryption Key: Used for secure message encryption/decryption
- Authentication Key: Used for SSH and other authentication systems
These keys are generated using standardized protocols (BIP32, BIP39, BIP44) that ensure consistent key derivation while maintaining security. The device typically supports 3-5 applications simultaneously, which can include both cryptocurrency wallets and security applications like OpenPGP.
Important: Removing wallet applications from the device does not delete your cryptocurrency assets. Due to deterministic key generation (BIP32/39/44), reinstalling the applications will restore access to the same wallets.
Implementation Environment #
For this implementation, I used the following setup:
- Host System: Windows 10
- Virtual Machine: Kali Linux 2018.01 (VirtualBox)
- Hardware: Ledger Nano S with OpenPGP application
Setup Instructions #
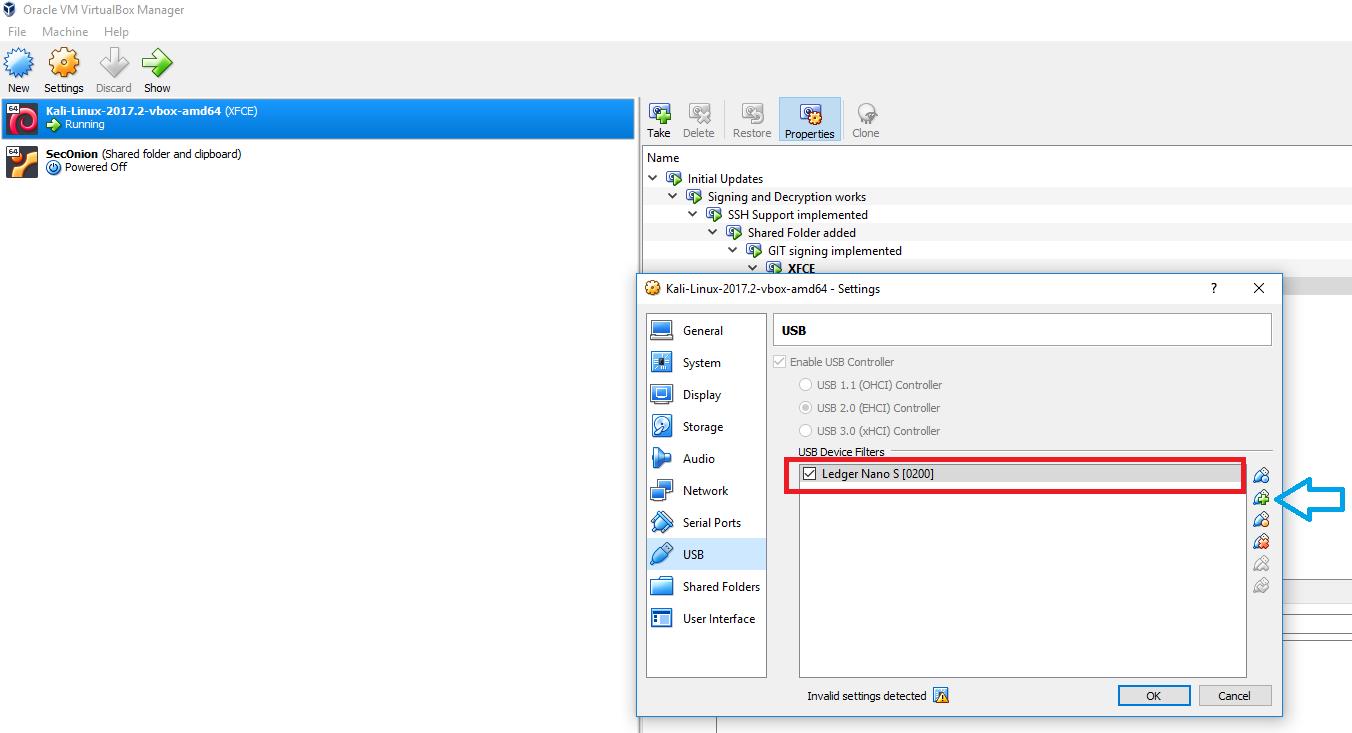
1. Virtual Machine USB Configuration #
First, ensure your virtual machine has proper USB access to recognize the Ledger device:
2. Install Required Software #
The following script installs and configures the necessary components:
#!/bin/bash
# Install smartcard daemon
apt-get install scdaemon

# Configure scdaemon for Ledger Nano S
echo "reader-port \"Ledger Token [Nano S] (0001) 01 00\"" > ~/.gnupg/scdaemon.conf
echo "enable-pinpad-varlen" >> ~/.gnupg/scdaemon.conf

# Start scdaemon
/usr/lib/gnupg/scdaemon --options ~/.gnupg/scdaemon.conf --daemon

# Restart and enable pcscd service
service pcscd restart
systemctl enable pcscd.service

# Verify configuration
if [ -e ~/.gnupg/scdaemon.conf ]; then
    echo -e "\nReader and delegated PIN Support added."
else
    echo -e "\nProblem creating scdaemon.conf!"
fi

# Configure SSH support
echo "enable-ssh-support" >> ~/.gnupg/gpg-agent.conf

# Set up environment for current session
gpg-connect-agent /bye

if [ -S $(gpgconf --list-dirs agent-ssh-socket) ]; then
    export SSH_AUTH_SOCK=$(gpgconf --list-dirs agent-ssh-socket)
else
    echo "$(gpgconf --list-dirs agent-ssh-socket) doesn't exist. Is gpg-agent running?"
fi
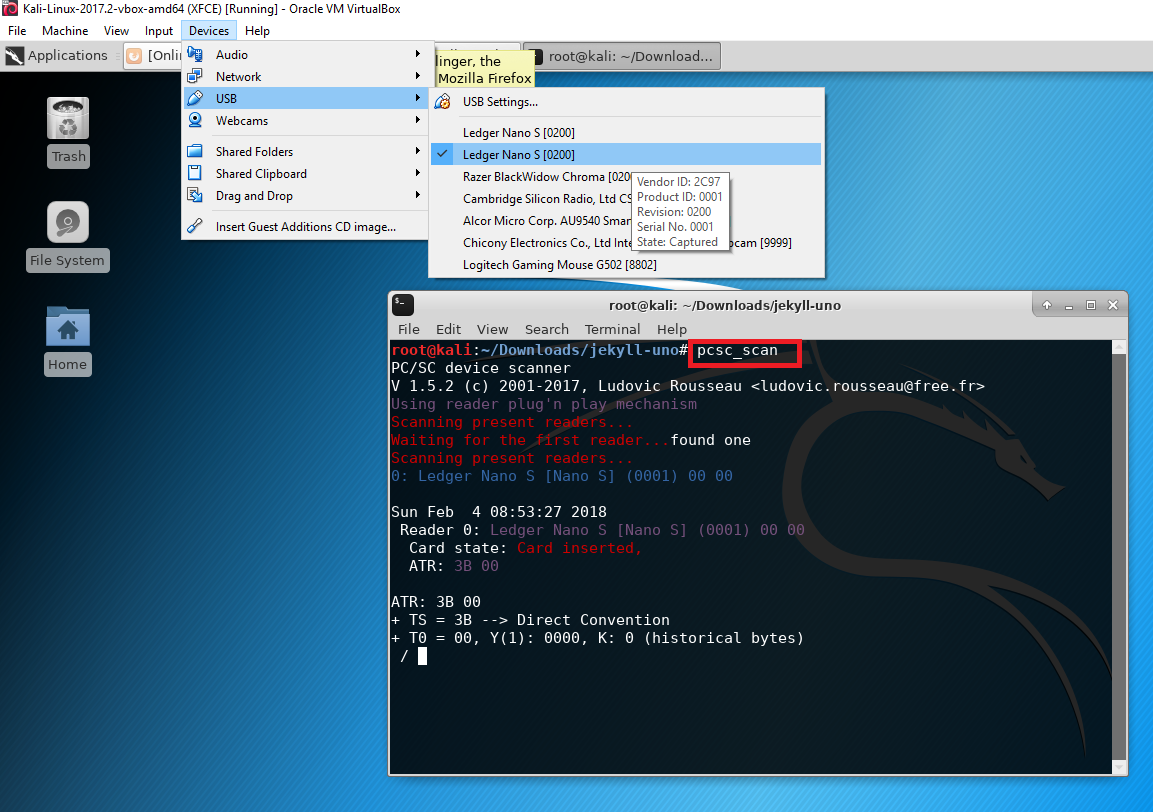
3. Device Recognition #
After executing the script, verify the device is properly recognized using:
pcsc_scan
If the device isn’t detected, toggle the USB connection in VirtualBox:
4. PGP Key Configuration #
If you haven’t generated OpenPGP keys on your Ledger device, refer to the OpenPGP Documentation (page 13) for the key generation process.
5. Git Signing Configuration #
Once your keys are generated, configure Git to use your hardware-based signing key:
# List available keys with their IDs and fingerprints
gpg -k --with-subkey-fingerprint --with-keygrip YOUR-KEY-NAME

# Example output:
# pub rsa2048 2017-08-25 [SC]
#     7886147C4C2E5CE2A4B1546C831415DA94A9A15C
#     Keygrip = DE2B63C13AB92EBD2D05C1021A9DAA2D40ECB564
# uid [ultimate] cedric
# sub rsa2048 2017-08-25 [E]
#     789E56872A0D9A5AC8AF9C2F8E95F2999EEC38C4
#     Keygrip = 9D7C2EF8D84E3B31371A09DFD9A4B3EF72AB4ACE
# sub rsa2048 2017-08-28 [A]
#     2D0E4FFFAA448AA2770C7F02C20B90E12F68F035
#     Keygrip = 6D60CB58D9D66EE09804E7FE460E865A91F5E41A

# Configure Git to use your signing key (use the [SC] key ID)
git config --global commit.gpgsign true
git config --global user.signingkey YOUR_SIGNING_KEY_ID
6. SSH Key Export #
To use your Ledger device for SSH authentication, export the SSH public key:
# Replace with your authentication key ID (the key with [A] designation)
gpg --export-ssh-key YOUR_AUTHENTICATION_KEY_ID
This will produce output similar to:
ssh-rsa AAAAB3NzaC1yc2EAAAADAQABAAABAQDCIARKh0IZTHld+I6oA8nwrgnCUQE8f
7X3pmI4ZwryT52fKhpcsQJsd3krodXrM//LiK8+m2ZRMneJ9iGlqqE7SCyZkNBj1GUm9s
rK3Q5eoR6nU0s+sq17b/FAtQWHBJTqqaOtyA33hFj5twUtWZ6rokX9cNZrD1ne8kRVHDe
3uEBsaY5PR1Tuko/GwywLyZu0SwfEobl/RPjL7P8rUSc7DTHpQMw8fjJFb4BNvIHAlaVC
5FwZwkuogygaJdN/44MayHFmOZmzx9CAgYgLpTzen35+CcyhlqCqi+HjNlnHL2DDWd4iR
d3Y6pY8LjS3xQkECc3Bhedptp17D+H9AVJt openpgp:0x2F68F035
Copy this public key to your ~/.ssh/authorized_keys file on remote servers for authentication.
Usage Workflow #
After completing the setup:
- Connect your Ledger Nano S to your computer
- Open the OpenPGP application on the device
- When performing Git operations that require signing, you’ll be prompted to confirm on the device
- For SSH connections, the system will request confirmation on the device before authentication
Security Considerations #
This implementation significantly enhances security by:
- Preventing Key Exfiltration: Private keys never leave the hardware device
- Requiring Physical Presence: All operations need physical confirmation
- Mitigating Malware Risks: Even if the host is compromised, keys remain secure
- Providing Portability: The same secure identity can be used across multiple workstations
Conclusion #
Integrating the Ledger Nano S with PGP for Git signing and SSH authentication creates a robust security solution for developers and system administrators. By leveraging hardware security, you maintain strong cryptographic protection without sacrificing usability across your development workflow.